Sunday, June 26, 2016

Dallin's Outdoor sectional

First, I have to say that I know a LOT of incredibly talented people. This post is about my friend Dallin's outdoor sectional he made from pallet wood. 
I am generally not a fan of pallets, they have oils and paints in them that dull the blades on power tools. They are hard to work with and to tear apart. That being said, there are ways of working with them to save your tools, and this project he did may just make it worth saving pallets for!
After he tore them all down, he rebuilt them into a fantastic outdoor sofa sectional. 
He also made a very cool propane feature out of pallets to go with it. 
The dedication and hours that he put into this project are definitely something to be admired! 
The beauty of this old wood in a new design is what keeps bringing people back to using pallets, there is nothing like it. 
Here is Dallin hard at work. We go to BYU together and he is rocking his man bun for the photo. (Photos courtesy of Dallin and his lovely wife) 
Look how gorgeous this turned out!!! Stained a beautiful and rich color and then cushions and pillows added for comfort and beauty. 
Again great job Dallin! You have a lot of talent.  I think this free pallet project is definitely the best one I have ever seen. 
I hope your family can enjoy it for many years to come! 
  If any of you are working on projects and want to share them, I would love to see what you are up to! 

Sincerely,
Lori Hatfield 
 

Tuesday, June 14, 2016

Real Wall

Here is another project for the Parade of Homes., I was able to help with
  This family is very into sports, especially soccer.  Danielle with Cahoon interiors designed a fun room with that in mind. 
She picked out fun colors and textures to go into this adorable boys bedroom. My part of the room was to paint the soccer logo and grain stripe on this brick wall. 
  I have done murals before but this was my first on brick. It was something I really wanted to do. Several months ago I posted about what designs I want to do in my future home using brick.  Here is a link to that post if you are curious. http://2spruceup4me.blogspot.com/2016/03/bricks-and-lofts.html  (You probably will need to copy and paste the web address, I couldn't get it to attach the link.)
  
Here is the room during construction. I think it's fun to see the before and after shots of any piece.  
I like to take pictures during the mid-process as well, just to show some of the detailing that goes into the work. 
  I really enjoy how it turned out. I love that aged brick look that we achieved in the final result after it was weathered and distressed. 
Thanks Danielle for this fun project. 
Here is the floor decal as well I was able to help with. My sister Michelle was able to get me connected with a designer at her work and together we made this happen.  (Thanks sis!)
It added a pop of fun color to this beautiful sports court. Pure Haven Homes and Cahoon Interiors did a great job with build and design. 

Sunday, June 12, 2016

4 year old princess!

Danielle with Cahoon Interiors had an idea for doing the most perfect pink princess room.  Here is how it turned out. My contribution is the night stand, mirror and dresser for this room. 
The dresser is more silver with gold highlights and the mirror is golden with silver highlights. 
They looked much different when they came to me.  The mirror was a brassy gold with a few broken spots.
I repaired the edges and made them look like the original flower and leaf design. 
Once primed and painted, it's nearly impossible to see the parts that were fixed. 
The dresser was a honey oak color and needed updating. 
It took sanding, priming, a base coat & several coats of metallic paint to achieve the look. After all of that, it still needed to be dark waxed and glazed. It was a long project with many steps! 
Even the handles were lightened and then silver added after. They are such a pretty shape, I'm glad we stayed with the original hardware. 
I love the chandelier and the soft pink ceiling Danielle picked out to go with it. 
From the delicate pink curtains to the soft textured rug, I think it's perfect for a princess!  Thanks for reading my blog, please like comment and share to keep seeing it in your FB feed.


Thanks! 
Lori


Dry erase table

This is the dry erase table I painted for the Parade of Homes and my husband epoxied. It was another request from Danielle with Cahoon Interiors. The table started out like this. It had great bones but it needed some work. 
I started by tightening everything up. It was very loose and the legs were slipping away from the frame. Next step was white paint to make it crisp and clean. I made a stencil for the design on my computer.
 I have found that stencils are never perfect so you have to put some skill into it. 
I ended up spending a lot of time with a sharpie and a steady hand. 
Then more detailing with the sharpie! It was a long process. When the white needed touch ups, it was a tiny brush and a steady hand. 
I think it worked out well.  When it was a good as I could get it, and dry, my husband helped me epoxy it. Sherwin Williams makes an epoxy that coats over surfaces to make a dry-erase board. 
Geoff works with epoxies at work everyday so it was great to have a Pro in the house to help! (Thanks Geoff!)
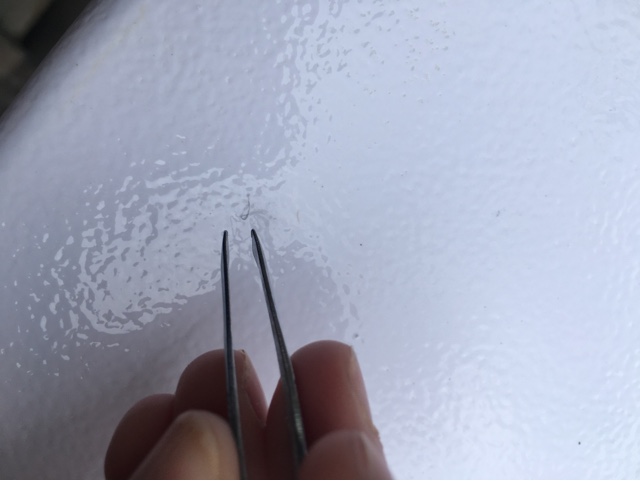
I spent the next few hours checking and re-checking to remove lint fuzzies that fell from the air. Using tweezers helps avoid fingerprints. I think every tree in the neighborhood tried to send cotton in the air that night. It was a bit stressful! 
I love the way it turned out and that kids and adults can sit and color for years to come!  A big thanks to Danielle for coming up with this challenge for me. 

Love, Lori


Map wall

My friend Danielle, with Cahoon Interiors asked me to help her design a metal map for a curved wall in the Parade of Homes. 
We walked the house together when it was just at its studs discussing ideas and shapes. Having a curve in the wall could pose a challenge. 
Also doing too much detail or too little could also not make it work out right.  These are some of the prototypes I sent in to Brian at Critical Laser.
We worked with Brian to make it just right. This is the final scale and shape we came up with. 
They were able to roll the metal to match the shape of the wall and drill holes to attach to the studs. 
  Here is the mock up of where the holes would be drilled. (You have to look closely to see the map outline.)
  
We spent time at their shop looking over their work and patina's. They are an amazing company and I would love to have more items done there in the future. 
Danielle decided to go with the patina acid wash on the metal. I think it turned out fantastic! 
From studs to finished work, I think it looks great! 
It gives the room a lot of texture and appeal.  I was happy to help Danielle with her vision for this space. 

Parade of Homes part 2 Aged Basketball Hoop


Here is an aged basketball hoop I made for the home. 
I teamed up with Cahoon Interiors again, to do this art piece that goes above the basketball court. 
I built the backboard out of blue pine with a knotty alder frame for the contrast. Then it was stained brown and grey washed. 
Here it is before I stained and distressed the backboard and hoop. It was a fun project to build. 
I made Danielle's family a smaller version for her home as a little gift.  I think it turned out really nice. 
A big thank you to my husband Geoff for helping me and supporting me in all these projects and the time I spent away from him and the kids. 


Thursday, June 2, 2016

Parade of Homes

I have been working with Cahoon Interiors to create some fun art and furniture designs for the Parade of Homes. The Parade of Homes is basically the Olympics of home building and interior design for the state of Utah. I am extremely grateful and honored that I have been asked to create for this project. 
This is the home I have been helping with. It's a stunning beauty in the hills above Saratoga Springs.
   I have been asked to do a few art pieces and furniture pieces to be showcased inside.  

This room turned out really lovely. The photo was taken by my friend Danielle. I did the dresser and the night stand for the room. I wish the whole room could be fit into each photo because the chandelier and the light pink ceiling are so delicate and soft.  This is the dresser and the mirror I painted. The dresser is in a metallic silver with gold highlights and the mirror is gold with silver highlights. I think they work out stunning together. 


I have done projects in other rooms that I will be showing in the next few days. 

  I am on vacation right now and I have gathered some fun new creative ideas for when I get home. Tomorrow I am going to a swap meet and I am excited for what treasures I might find down here.
   
More fun photos to come soon!
Until then, I'll enjoy a little sunshine. 
 Love, Lori