Wednesday, December 21, 2016

Table Troubles

This is my not so glamorous kitchen table.  We debated long and hard if we even should bring it to our new house. Neither of us wanted to display beat up furniture in a new home that we are so excited about.   
I'm going to show you the good, bad and ugly of this project from start to finish. This one may take awhile because I've never worked on a piece in this bad shape before.  The chairs are half black and half white because the white ones have primer on them. We purchased the chairs from a yard sale. The table was my Mother-in-law's table many years ago, it has sustained a lot of damage over the decades. 
 
It's not a solid top table and water damage from spills & heat (possibly from a rogue pizza box) has caused the lamanate top to raise and split and show the particle board underneath. The table is the texture of sawdust underneath the flaking off wood.  
 
The white paint on the table is from other projects past, it's been a table I used in my Saratoga Springs home when my kids were very small and we did many art projects on top of it.  I no longer do art on the kitchen table (most of the time) and my kids are older so I think it's time to re-finish this into something beautiful.
    I have at least two other wood tables at my house right now, and all are in better shape than this one -I'm a bit of a furniture hoarder- and my husband has asked me many times why I am saving this one. The answer is complicated, I like the size and shape of this one, and I want the challenge of seeing if I can repair something in such bad shape.  
  I refinished this one for a friend a couple of years ago. Her table is the same design but her table was solid wood and it was without major damage. 
 
I have a plan for my damaged table, it may take awhile since my workspace is still upside down. Moving to a new home is awesome but my wood shop at home will be non working for several more months, my husband is planning on insulating and putting in dry wall before he wants me to use it.  I'm planning on taking these pieces to the basement and painting in a makeshift spray booth down there, until my workshop is done. 
  Do you remember my media center I refinished?  Here is a refresher picture if you missed it.  
I want to do my kitchen table to coordinate with the media center and with my kitchen.   I want to do the base of the table in the antique white of my kitchen cabinets, and the chairs in the blue metallic of my media center, with a dark stained table top. 
 
The damage to the table top is very severe but I want to see if I can pull off a repair miracle.  It's not the table I ultimately want for my dining room.  The table I really want is one I want to build myself, with very plush tufted formal dining chairs.  It's going to be down the road a long ways so this is an interim piece.  For today and the next little bit, a tablecloth makes most of the badness go away.
I am definitely going to start with getting all the chairs one color.  I have a few other projects outside the home coming up, these ones are incredibly fun and exciting, I can't wait to show you! 

  Have a very Merry Christmas!  

Love, Lori 


Wednesday, December 14, 2016

game room

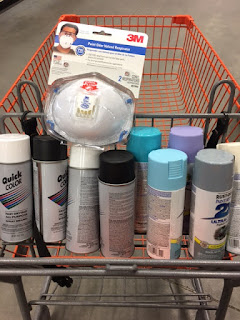
So about 11pm I got a wild hair to paint an elephant on my wall. I asked my husband. (while he was sleeping, and he said it was ok, lol)  I had some spray paint at home so I jumped into it right before the kids went to school.  I started spraying blues and teal colors on the wall.   This is the wall before I started.
Moving boxes, boring chairs and my ceiling fan waiting to be hung up.  I had a few cans of spray paint so I started but I quickly ran out.  I had to make a quick trip to The Home Depot to get a few supplies.  I have done some spray painting on canvas at home but this is my first spray painting on a wall.  I wanted to see how it would work with adding details.  I have painted several murals but this is the first 100% out of spray paint. 


After it being super bright and colorful, I muted down the blues, purples and teals.  I like the more muted colors better.  My oldest said "let's talk about the elephant in the room" lol,  she's so corny.

 There is still SO MUCH I want to learn about using spray paint to do murals, I'm still more comfortable with using a brush and paint, but it's good to start somewhere.  This is the kids game room tonight.... much more interesting than the boring wall. My kids and sister asked what the LHD stands for, I just added designs after my name to go with my blog and instagram.
Here is the elephant from several angles.  I'm not sure if I am satisfied with it or if I will paint on him some more.  I was going for an urban jungle theme.... I might add more to the other walls and then come back and tinker with him more or I might leave it for awhile until I get what my husband calls a "creative seizure".

For scale here are my kids, Adventure Baby 10 and Danger Baby 7

They can have something funky in their game room. Danger Baby came home from school and said it was "freaking awesome" so I think she approves. 

Well, that's it for today.  I stayed in the parameters my husband asked for and I finished and cleaned up before he got home so it's win-win.  If I change my mind or my taste, I can paint the wall back to the original color and start again. 

Have a great week!
LOVE, Lori 

Thursday, November 17, 2016

Moving Time

Moving Time

This will be the way my blog will look from here on out for awhile. Please make sure you like, comment or share if you would like to follow my adventures.  


We closed on our house this week and got the keys. We are excited to be home owners again and not renters anymore. After a million trips to Home Depot and Target, I have some hardware to hang up my curtains and details
  In case you missed it, here is the last project I finished before we closed up shop for a bit. 


  Here is one of my daughters rooms, my other girls room mirrors it with the pass way between. 

  My girls have always slept in the same room. We tried having them in separate rooms before but they kept getting sad and coming in with us until we put them back together. They are getting older (7&10) and now they want their own rooms but still be able to be close. So we added a half-door opening for between their walls.  Someday I will close it in with a bookcase that is a secret opening for a hidden passageway.
  

 I can't lift all the heavy things because of my bad back, so I am doing decorating duty. "Danger Baby" my 7 year old wants a pink princess room so here is a sampling of how it is coming together.  

"Adventure Baby" is 10 and she wants a teenage vintage hippy type bedroom. So here is that dresser I got (for free, it's an older Ikea one) and I turned it into a VW Bus design. 

  I will try to post more each day as I get things done and organized. I'm excited to be able to paint, decorate and design my own place for a little bit. Since most of my tools are in transit, I don't know when I will be building again, I hope soon!  I really do love getting my hands dirty. 

  Have a great day!
Love, Lori 

Thursday, October 6, 2016

A little birdhouse in your soul

Today I will be starting on a birdhouse I've been commissioned to make. It's not really a birdhouse but more of a bird condo.  I don't have any pictures of it on hand to show you but I do have pencil sketching sour in my shop that I will post later. 

 I was looking online for some examples of other bird dwellings for multiple bird friends. 
It's going into winter here but this sweet lady (who I am making it for), is happy to get it anytime. She is such a doll and a great friend! 
Here are a few more examples of other birdhouses. 
I am going to be taking some items out to our human house we are building for our family.  It's getting closer to being done. We hopefully will be in by Thanksgiving!  I have some fun things I plan on doing for that once we are in. 
   

I'm also working on some fun metal art coming up! I can't wait to show you that. 
I have a couple of different styles I'm cooking up. Some that are more design and some that are more pictures. 
I have also been dying to get back to doing some fine art on canvas. Canvas is where I started out decades ago. In the winter I would be in my parents garage painting and freezing until they purchased me an oil heater. I spent many years staying up late into the night painting in that tiny garage. (I think some of them are still out there) 

Have a great weekend everyone! Happy Art-tober 

Love Lori 

Wednesday, October 5, 2016

New Age Commercial Sign

I am excited to show you the sign that we have been working on.  
  My friends Brian and Melissa are building a wellness and massage therapy center in American Fork, Utah and they have asked me to help with a few items for their offices.  Their office is so beautiful and they have put a lot of hard work into it. I hope to show you more of that later.
   I have been helping with getting their signs and vinyl logos on the building. This is the design idea I drew up for the outside of their business that will hang on the exterior brick wall. 
After getting the wood pieces cut, stained and assembled we also did the laser cut metal and wood letters. 
Lots of adhesives, many trips to Home Depot, and Lowe's, a lot of pressure and time later, we had the sign on it's way. My partner in design, Rebecca,  is helping me with putting this sign together. I need to get a really good photo of us not covered in stain or adhesives before I'll post a picture though. 
The wood cut outs helped give the sign some depth and shadow. The metal on top adds a bit of flare! 
The wood is still wet from the outdoor top coat sealer in these pictures but it should dry to a nice semi-gloss finish. 
The weather started getting rough outside so we brought it inside to dry. I'm excited to help mount this to their exterior brick wall tomorrow!  The reverse side has bracing and brackets to add sturdiness but not a high profile away from the wall. We really wanted the logo and the lettering to be what stands out. 
I'll post some photos when it's on the building.  I'm excited to do this commercial project and I hopefully have another big one in January coming up. What do you think, do you like the sign? Please leave comments or share if you like it to keep me active in your FB feed.

 
Thanks!
Love, Lori

Sunday, September 18, 2016

Halloween Chair

Hi everyone!

   Sorry it's been such a long time since I did a blog post. I am in a constant battle between my bad back and trying to be productive. I have also been juggling back to school schedules and karate for my girls alone, while the husband has been working away. 
    I have been finishing up a few items for friends and I just finished this pressed back chair for my Mother-in-Law.
Here is what the chair looked like before. It is one of those detailed oak chairs that were pretty popular a few years ago but are becoming more of a rarity now. 
  Shirley gave me a lot of fun ideas of what she liked & found on Pinterest,  then she gave me creative license to use my own artistic eye.  I wanted to bring out the fun details of leaves and acorns in the back of the seat. 
Dark waxing wouldn't do because some of the grooves were too shallow, this is where a sharpie (several sharpies) and lots of hours went into getting the details. The dark wax did help to enhance it when it was done but most of it needed more attention to detail. 
The middle section to me looks like long finger bones, fun and creepy. Then I added words and a pumpkin on the seat.
I think it goes well with her home decorations. 
Shirley always does a great job decorating for every holiday. 
 Here is a little clown, resting his tired bones!
I was at first worried that the antique white details were too much for her decor but when I got it there, it matched perfectly. 
She has every corner adorned in spooky decor to delight the senses, most of it she has made herself! 
Everywhere you look it's a feast for the eyes! 
She likes miniatures as much as I do, so there are quite a few treasures hidden in each display. 
All of her items are consistent with a fun, vintage Halloween theme! Check out these pillows! I love these so much, especially the cat faces. 
My husband loves going home to see how she has it fixed up so nicely! Once we finish moving, I hope to decorate more like this. I just need to convince the kids to help me keep the house clean! 
So there are a few candid house shots from her place. 
There is really so much more I could show you! 
Literally every corner of her place is beautifully decorated and it should be in a magazine! 
Christmas is coming and her decorations for that are just as fabulous but Halloween is my favorite for decorations. 
I will be moving in a few weeks, (the drywall is done) and after we move I will have a dedicated work station. I hope to produce more, body willing, and show you more fun things! 
  
 Oh, P.S. I'm excited I got a stamp to start putting on my furniture and designs! Here is the first item I have made that I have been able to stamp. It went on the bottom of the chair. From now on, my larger items will get this stamp & maybe I will get a small stamp for my little design items in the future. 
 So from beginning to end, I think it turned out pretty cute. I'm happy with it and I think Shirley is too.

  Have a very Happy Halloween everyone!

Love, Lori